In the last post of this series, we set up a VM to run NixOS using VirtualBox. Now we actually need to go ahead and install NixOS. We’ll be installing it into our VM, but if you are installing it into an actual machine, most of the instructions here will work for you.
This post is based on this article on the NixOS wiki, but there are some differences because I chose to configure NixOS differently.
Installing NixOS
- Go to the NixOS download page and download a release of NixOS. At the time of this writing, the newest release is 14.04, and I chose the Graphical Live CD, 64-bit Intel/AMD version, which is recommended for most users.
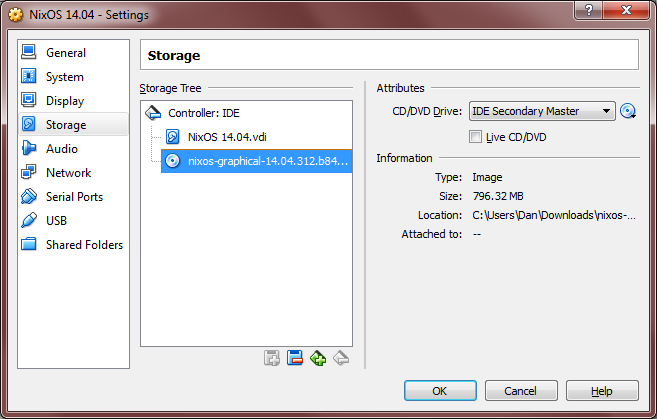
- Open up the VirtualBox VM Manager and select your NixOS VM. Then choose Settings > Storage. Click the CD icon in the storage tree. Then, on the right side under Attributes, click the CD icon to choose a virtual CD/DVD file. Select the nixos ISO file you downloaded in step 1.

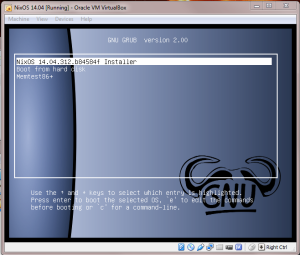
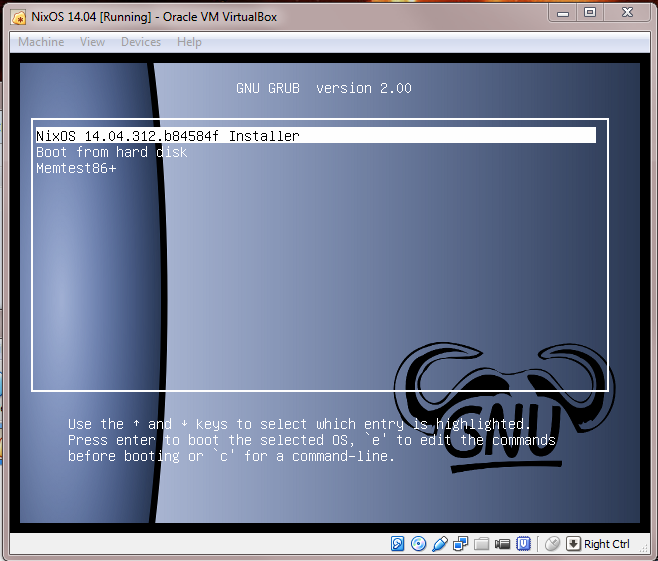
- Click OK, then start. You should see the following menu. Choose the first option, NixOS installer. It is chosen for you automatically after about 10 seconds.
- After the NixOS installer boots up, you’ll be at a terminal login prompt that tells you to login as root. Enter
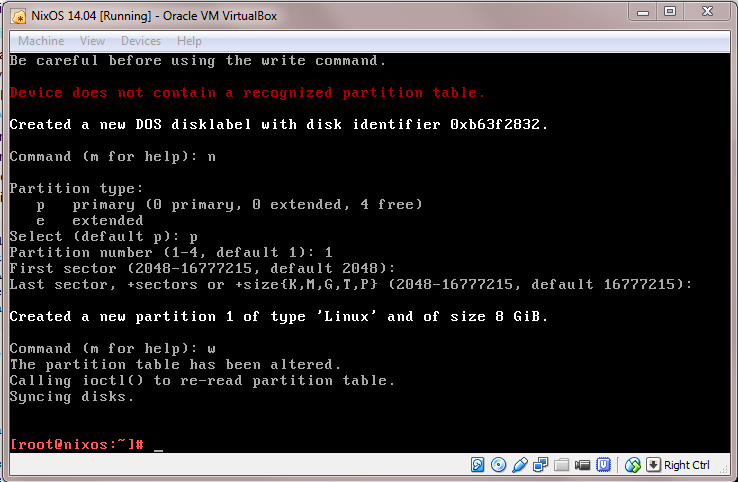
rootfor your login name and hit enter. - So far, we haven’t actually installed anything. Before we can do that, we need to initialize the file system on our virtual machine so it can read and write files to our virtual disk we set up in the previous post. The first thing to do is create a partition on our virtual disk. Type
fdisk /dev/sdato run the disk partitioning program, which has a simple but completely non-intuitive interface. The commands I entered, in order, are
n(for new partition),p(for primary partition),1(assign partition number 1), no selection (defaults to 2048 for start of partition), and no selection (again, default). Finally, I enterwto write the partition to disk. See below.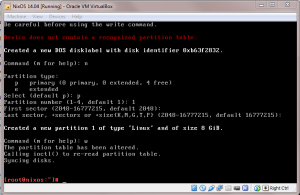
- Next, we need to make a file system onto our new partition. Enter
mkfs.ext4 -j -L nixos /dev/sda1This command will make a new file system with the ext4 format into partition 1 of sda, enable journaling, and give our new filesystem the label nixos.
- Now that we created the filesystem, we need to mount it. Mounting it is like connecting different filesystems together, but in this case we need to connect our filesystem to the OS. Mount the filesystem with
mount LABEL=nixos /mnt
That’s the last step in setting up the disk and file system. Next, we’ll configure NixOS itself.
Configuring NixOS
If you just want to get NixOS set up as fast as possible, skip to the instructions below. Before I get to that, however, I’ll briefly describe the Nix philosophy and implementation from a few different levels. These are just my impressions and understanding from using NixOS for a few days, but I have found this information to be crucial in order to do anything useful.
NixOS is a Linux distribution built around the Nix package manager, which is available for installation on other OSes if you want, but is the only package manager for NixOS. Every piece of software installed on the entire system is installed through Nix.
So what makes Nix useful? In most other package managers, new versions of software replace older versions. If some component of the system depends on that software but is incompatible with the new version, then it will break after the upgrade. Extend this problem to the huge graph of intermingling dependencies among all the software on a user’s computer and you get what’s called dependency hell. Other Linux distributions try to prevent dependency hell by keeping official lists of software packages that are expected to be compatible, installing packages from this list, and occasionally updating the list with new versions.
Nix, on the other hand, installs new version of software side-by-side with their older versions, and older versions are deleted only when they are no longer required. Nix achieves this through a combination of two mechanisms: a sophisticated system of sym links that keeps track of which version of packages are “active” at any time and a build system that exhaustively describes every input into each individual package.
The second part is the part we need to understand for our next steps. Installing new software requires writing a Nix expression that completely describes all the prerequisites and dependencies for the software to be installed. These dependencies can themselves be Nix expressions defined elsewhere. When we install new packages, what we are doing is running a Nix expression for that package. Nix first recursively ensures all build dependencies are available, either by checking that they are already built or by running Nix expressions to build them. Then, it builds and installs our new package.
This is exactly the process we’ll use to install NixOS itself.
- First, we need an expression that will define the components we want to build and install. We can make one and configure it using
nixos-generate-config --root /mnt
nano /mnt/etc/nixos/configuration.nix
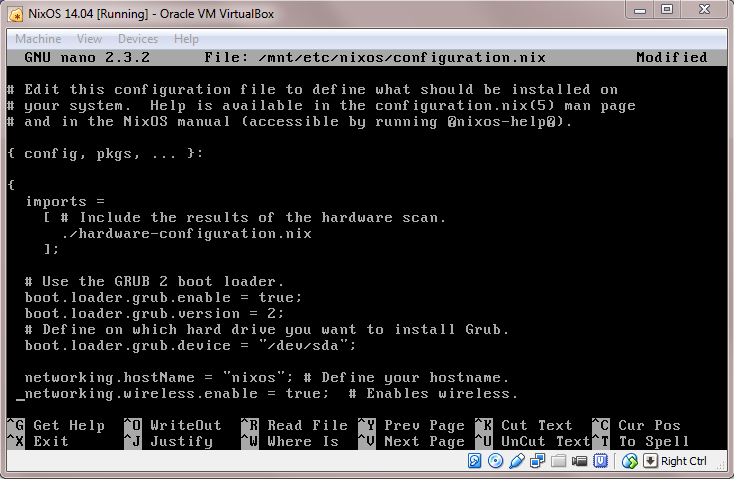
This will open the configuration.nix expression in the nano editor.
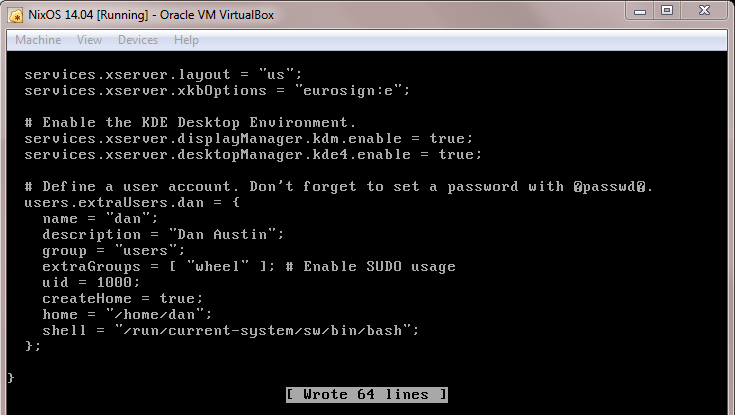
- The configuration looks something like the one below. Use the arrow keys to navigate through the file. Lines marked with a # are comments, and several important configuration lines are commented out by default. Use nano to move the cursor around and delete the # to enable the features you want. In the picture, I have deleted the #s for
boot.loader.grub,networking.hostName, andnetworking.wireless.enable. I also uncommented all the lines that begin withservices.xserverto enable a GUI. I also uncommented the lines at the bottom of the file that add a new user and modified them as shown. When you are done, use Ctrl-O to save the changes and Ctrl-X to exit.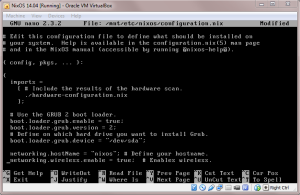

- With the configuration.nix nix expression defined, we are ready to install NixOS! Run
nixos-install
to start the installation. If there is a problem with the filesystem and the installation refuses to start, you can redo the steps starting with the
fdiskstep, but used(for delete) as the first command to delete the primary partition and start fresh. - After installation completes, shut down the virtual machine, and in the VirtualBox Manager go to Settings > Storage, click on the CD on the right hand side and choose “Remove disc from virtual drive.” This removes the NixOS installer from the boot menu so we don’t boot into it by default. Then start the VM again.
- When the VM boots up, you should see a graphical login window. We can’t log in yet because we need to change some passwords first. To do this, we need to use the command line again. Access the console login using the Power drop down menu.

- Log in as root, which still has no password. We will change that right now with
passwd
Enter a new root password for your system. If you created any users, you can set their passwords also with, for example,
passwd dan
rebootone final time and verify you can log in successfully.
That’s it! whew Next in the series, we’ll tackle how to install essential software.